
How to shoot drone photos for Real Estate and Property
The holy grail of shooting real estate and property with drones. Learn how to shoot, execute and edit drone photos for real estate. With the 4 most common types of shots used in real estate marketing, it is important to be able to not only execute these shots but to do it safely and legally!
The biggest tip Aaron has learnt from years of real estate photography is to know exactly what the client is after before shooting. Ask for a full brief. Even ask for examples of images they like so you have a guide into angles, lighting and post-production work.
TYPES OF DRONE SHOTS FOR REAL ESTATE
While photography is art, and art is subjective, you need to remember you’re not creating a masterpiece that is going up at the Lourve for the next 100 years. According to Real Property Photography, most real estate photos have an average shelf life of 7 days. With this in mind, you need to make sure standards are high but not to the point of spending hours and hours on 1 single image.

We have narrowed it down to the most common types of drone real estate photos:
- Top Down/ Nadir/ Bomb Shot
- Oblique/ 45degree/ angled Shot
- Pole Shot
- Twilight shot
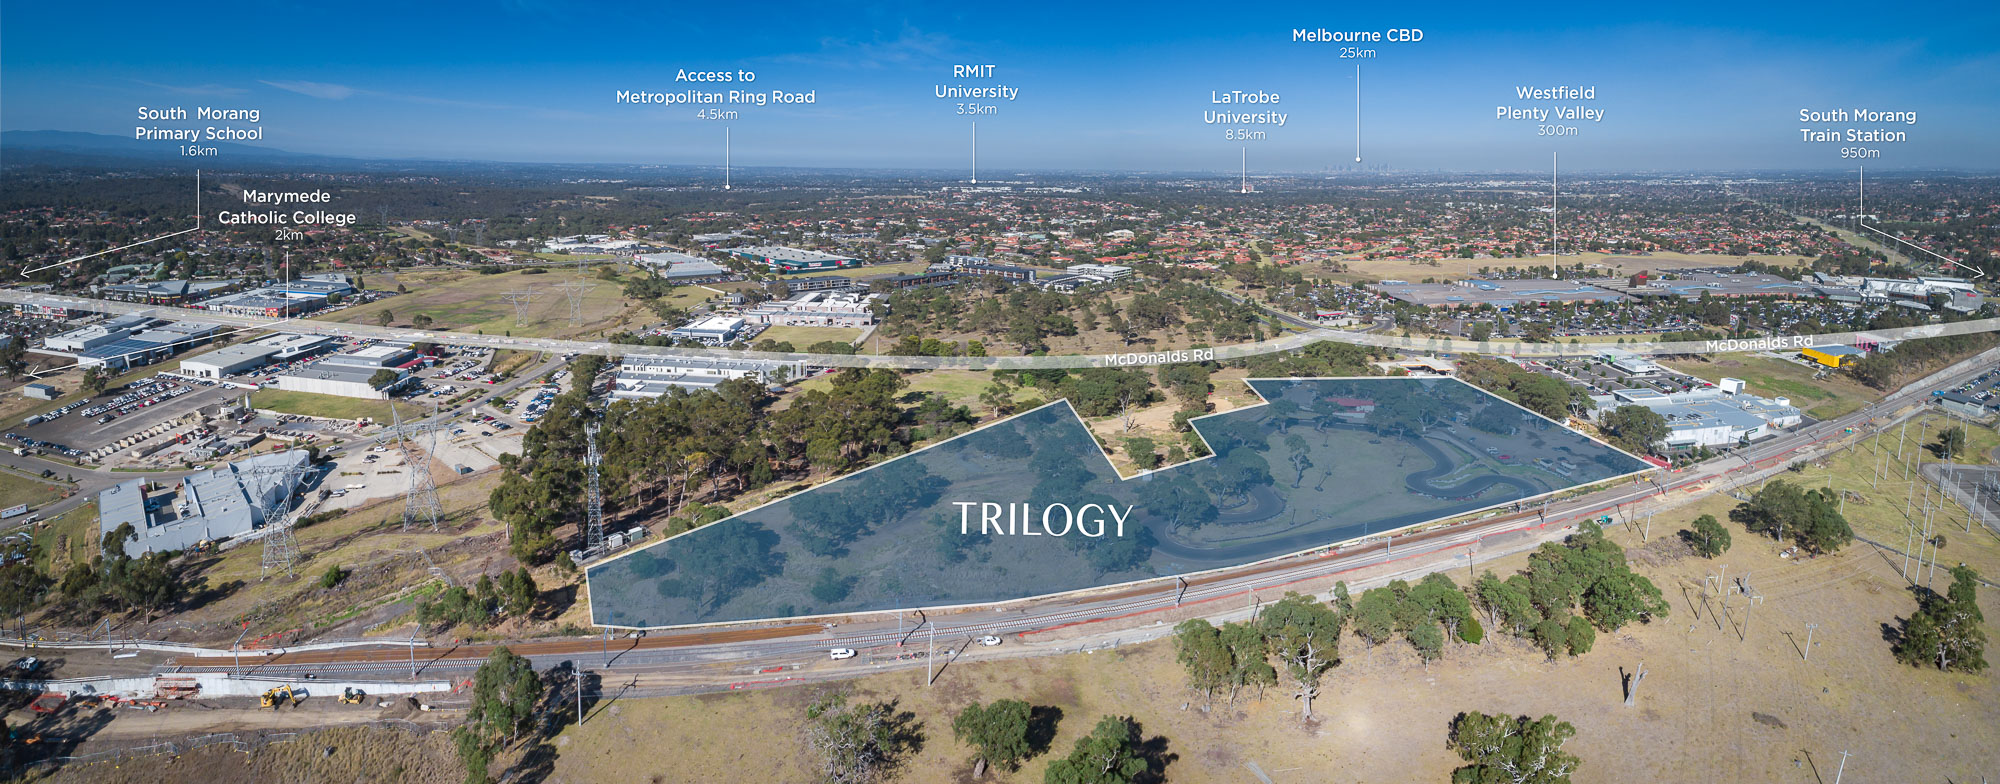
Remember, drone photos are taken as an addition to the usual ‘in-house/ ground’ shots and provide viewers with a unique perspective of the property from the air. Most importantly, they offer the ability to show location and proximity to neighboring selling points such as schools, shops, and public transport.
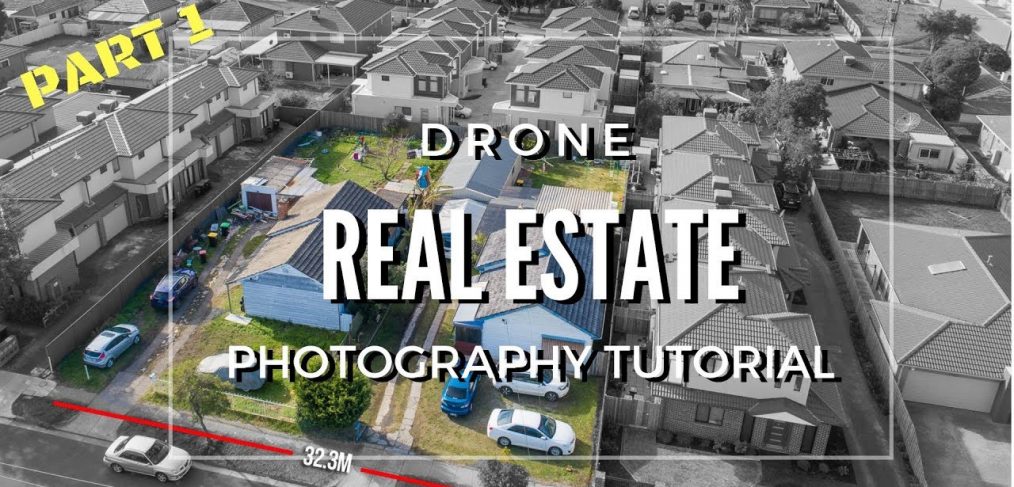
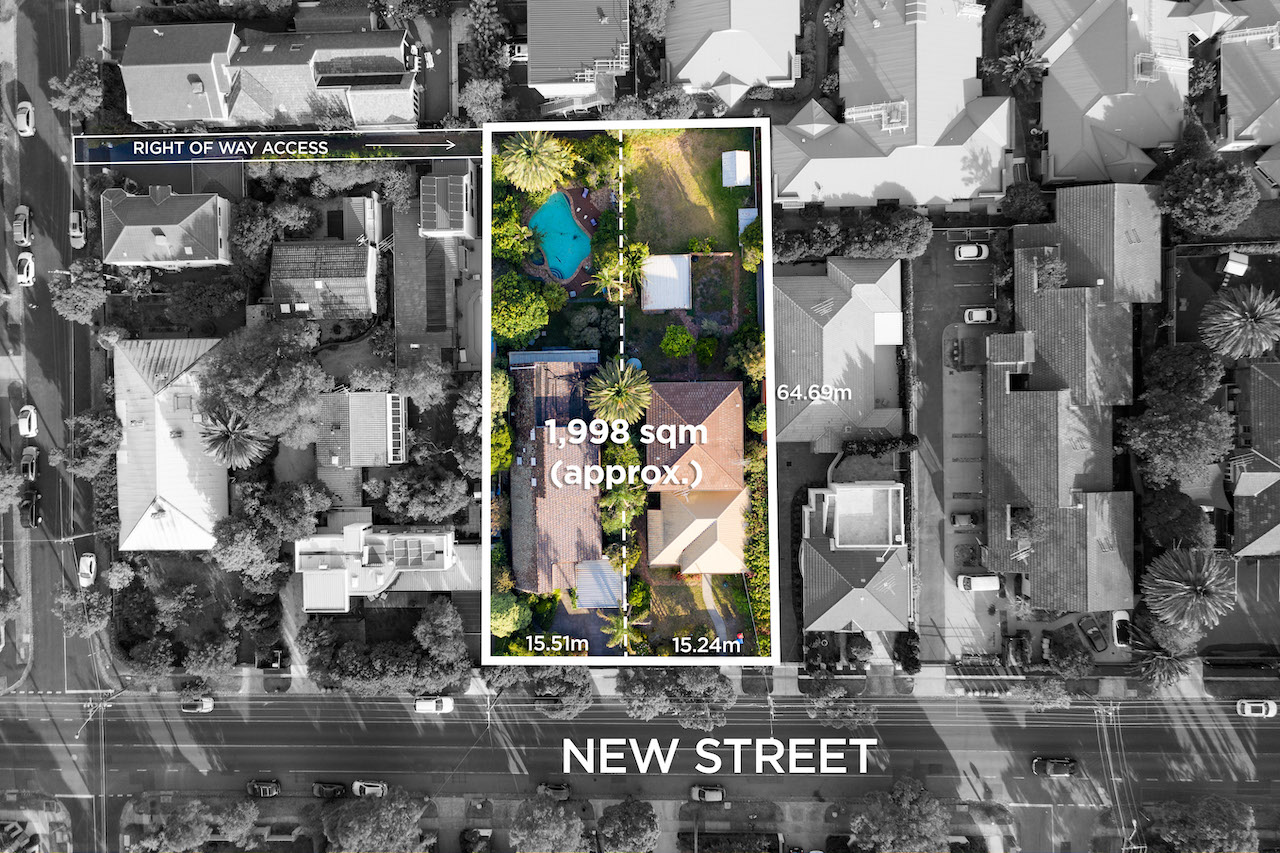
Top Down Shot
By flying directly above the property and looking straight down, this shot gives the potential buyer an understanding of the size of the lot. Later, in post-production, you can include annotations such as dimensions, frontage, area boundary lines etc.
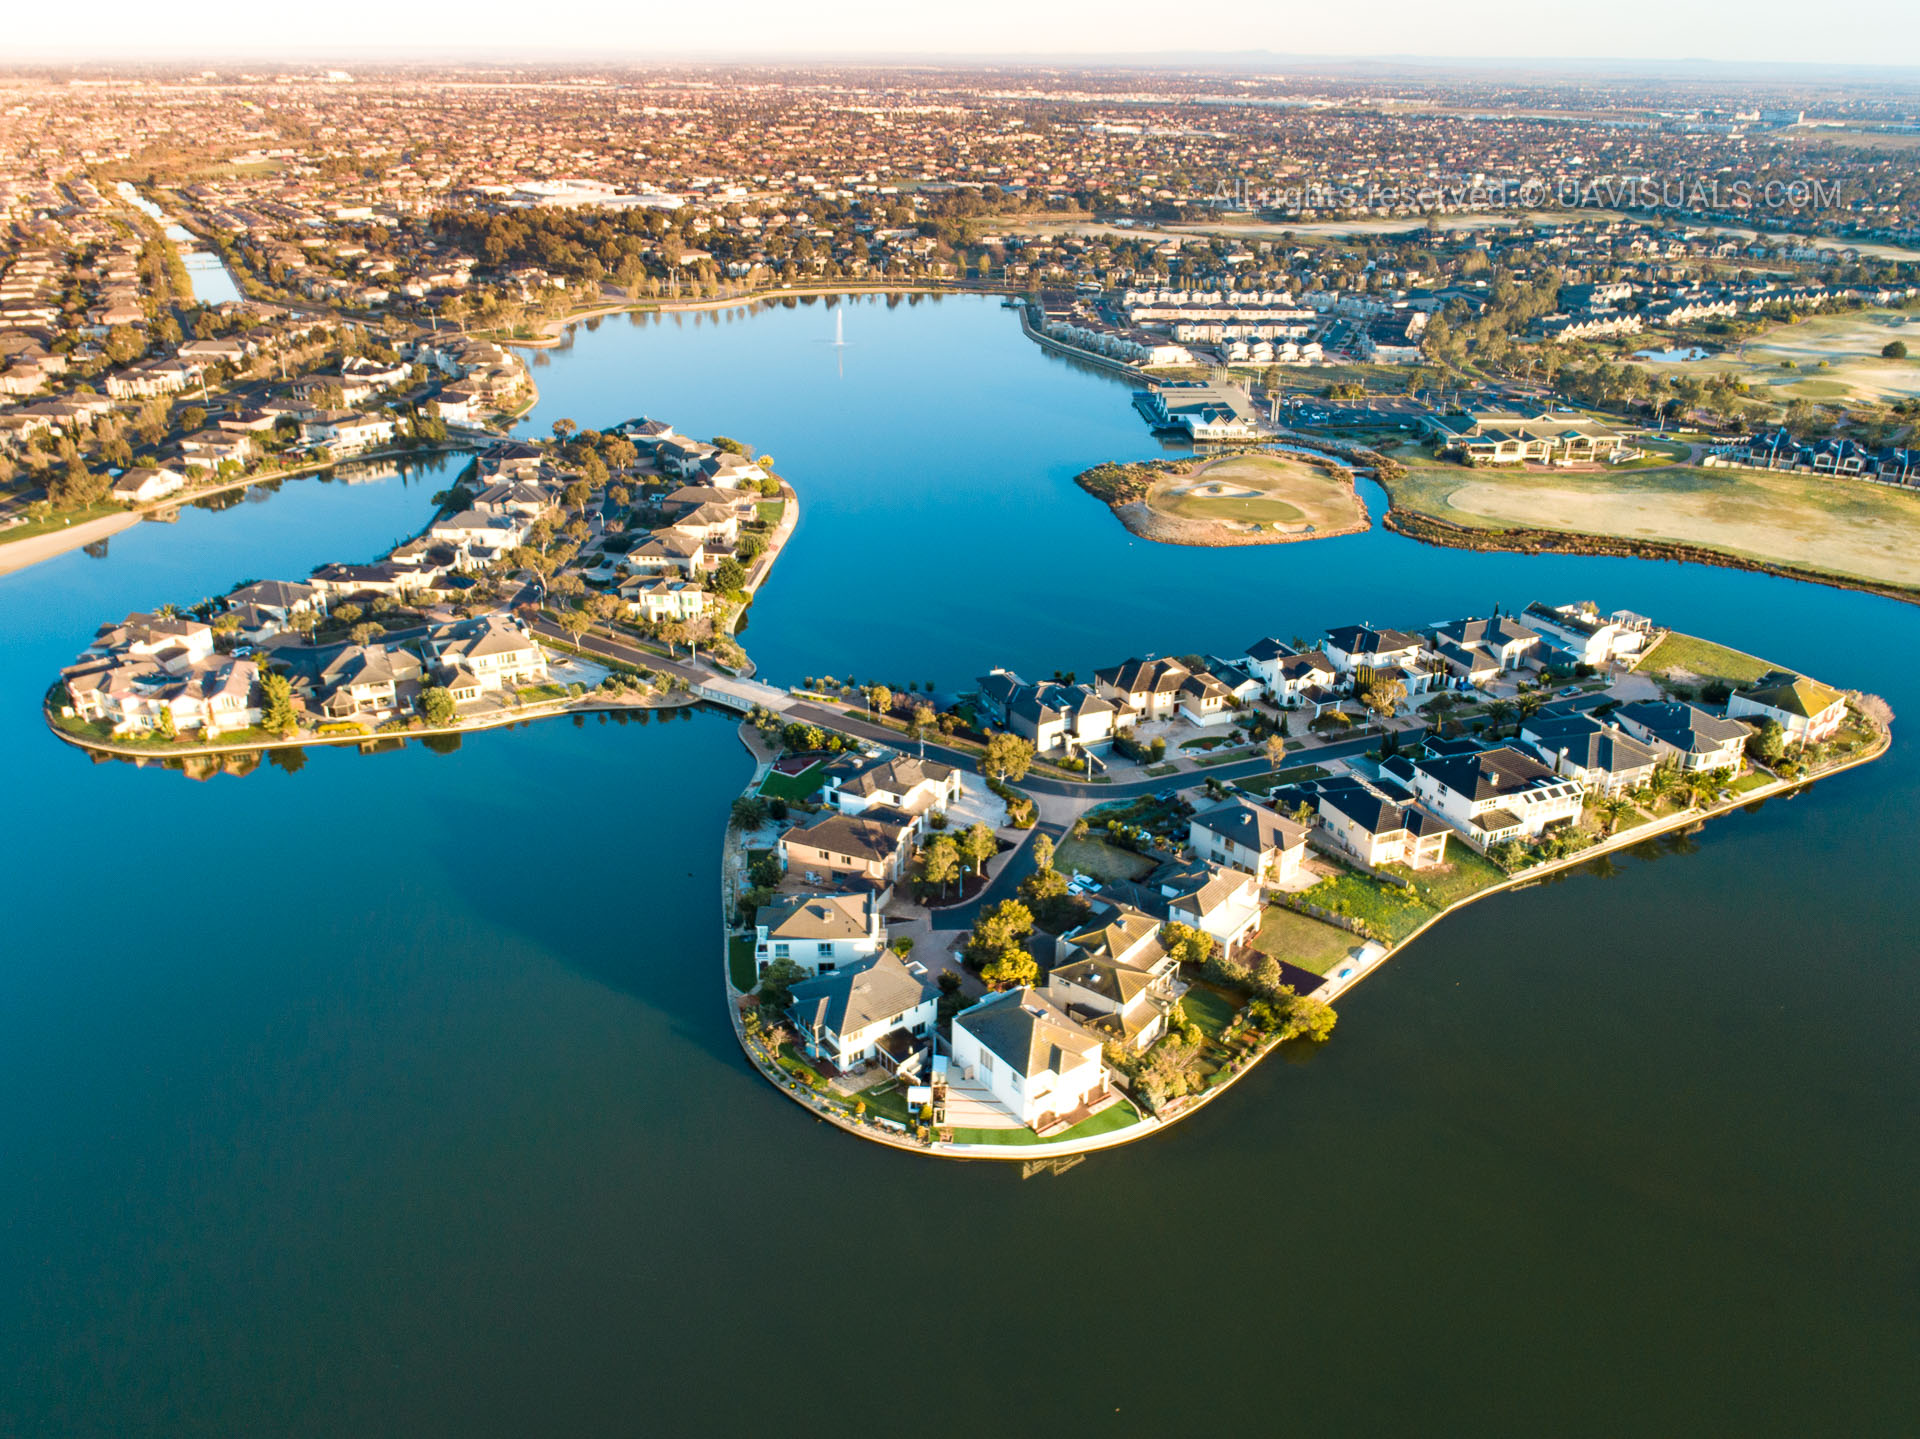
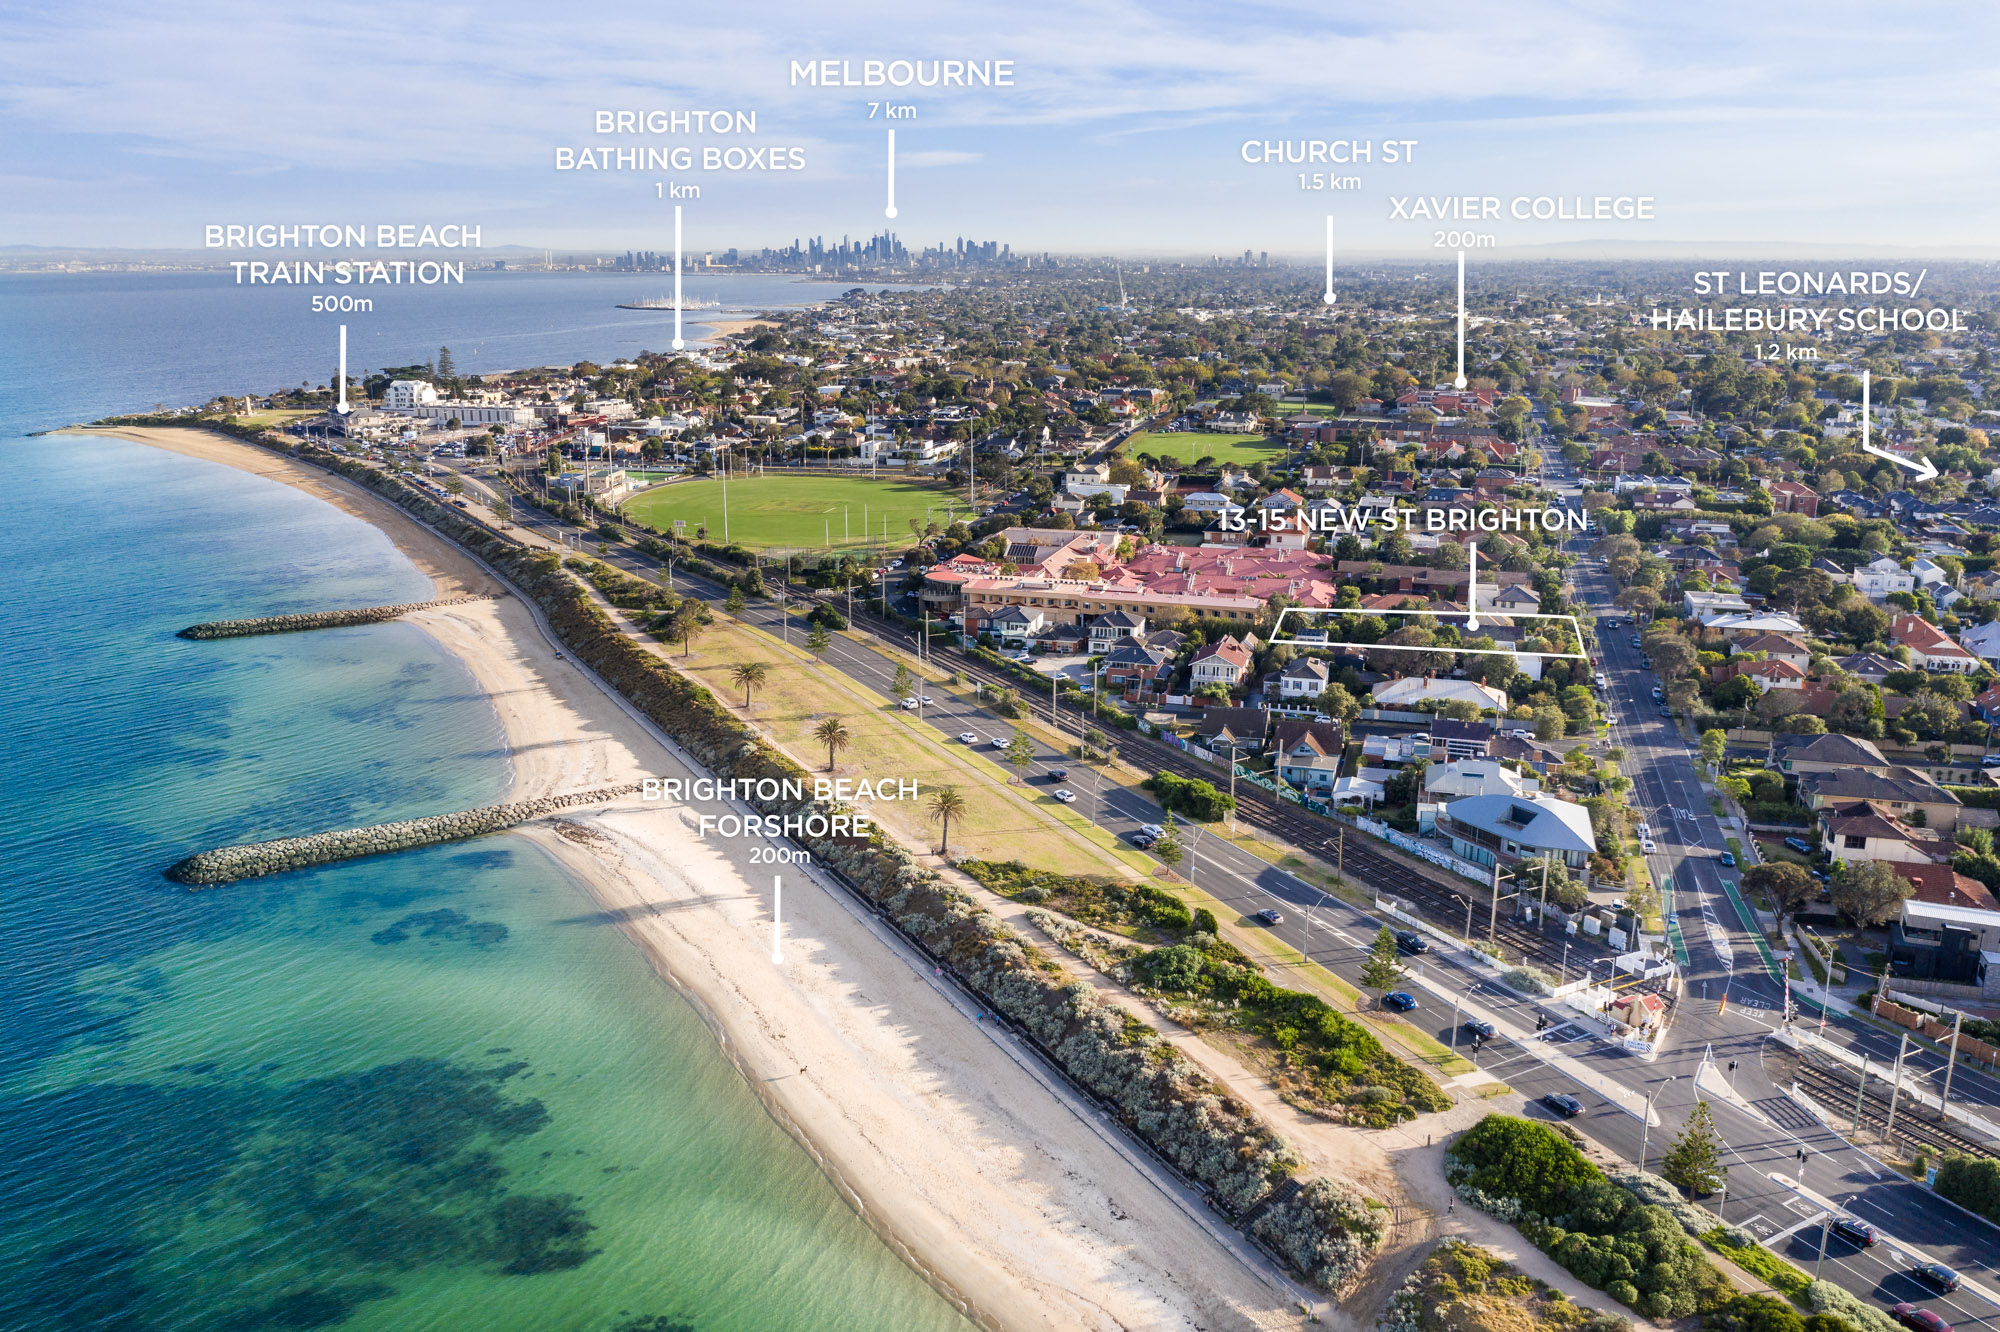
Oblique Shot
This is where the camera is pointed at a 45-degree angle, with the property in the lower 3rd of the frame. Framing should include the land, horizon, and sky. It is generally taken roughly 200 meters away from the property, allowing for the surrounding area and point of interests to be in the shot too.
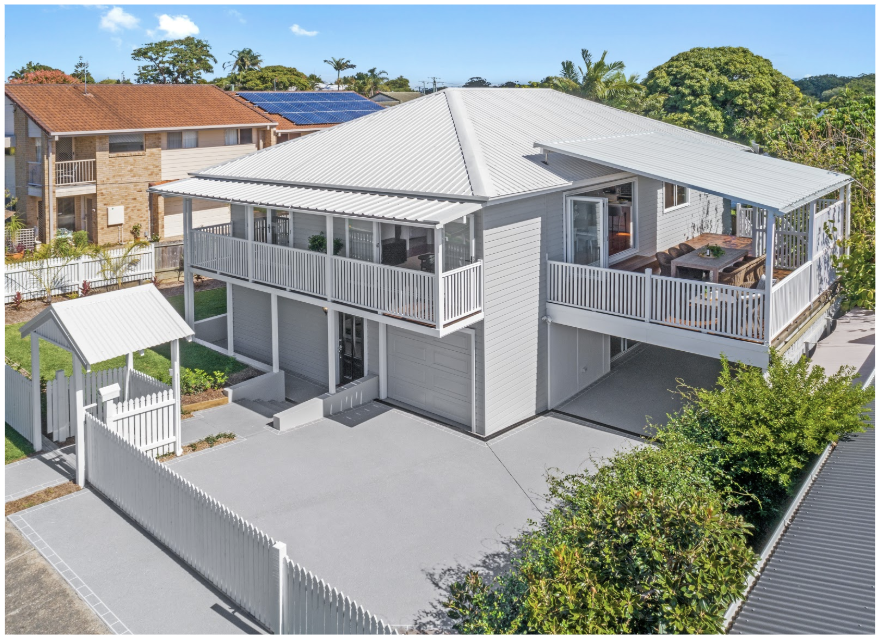
Pole Shot
This type of shot replicates pole photography which is where a camera is mounted on top of a pole to take a photograph. Using a drone, is a quicker and simpler way to achieve this shot. It is generally taken 15 to 20 metres above the ground (just above tree line or the powerlines), shooting straight-on or on a slight angle.
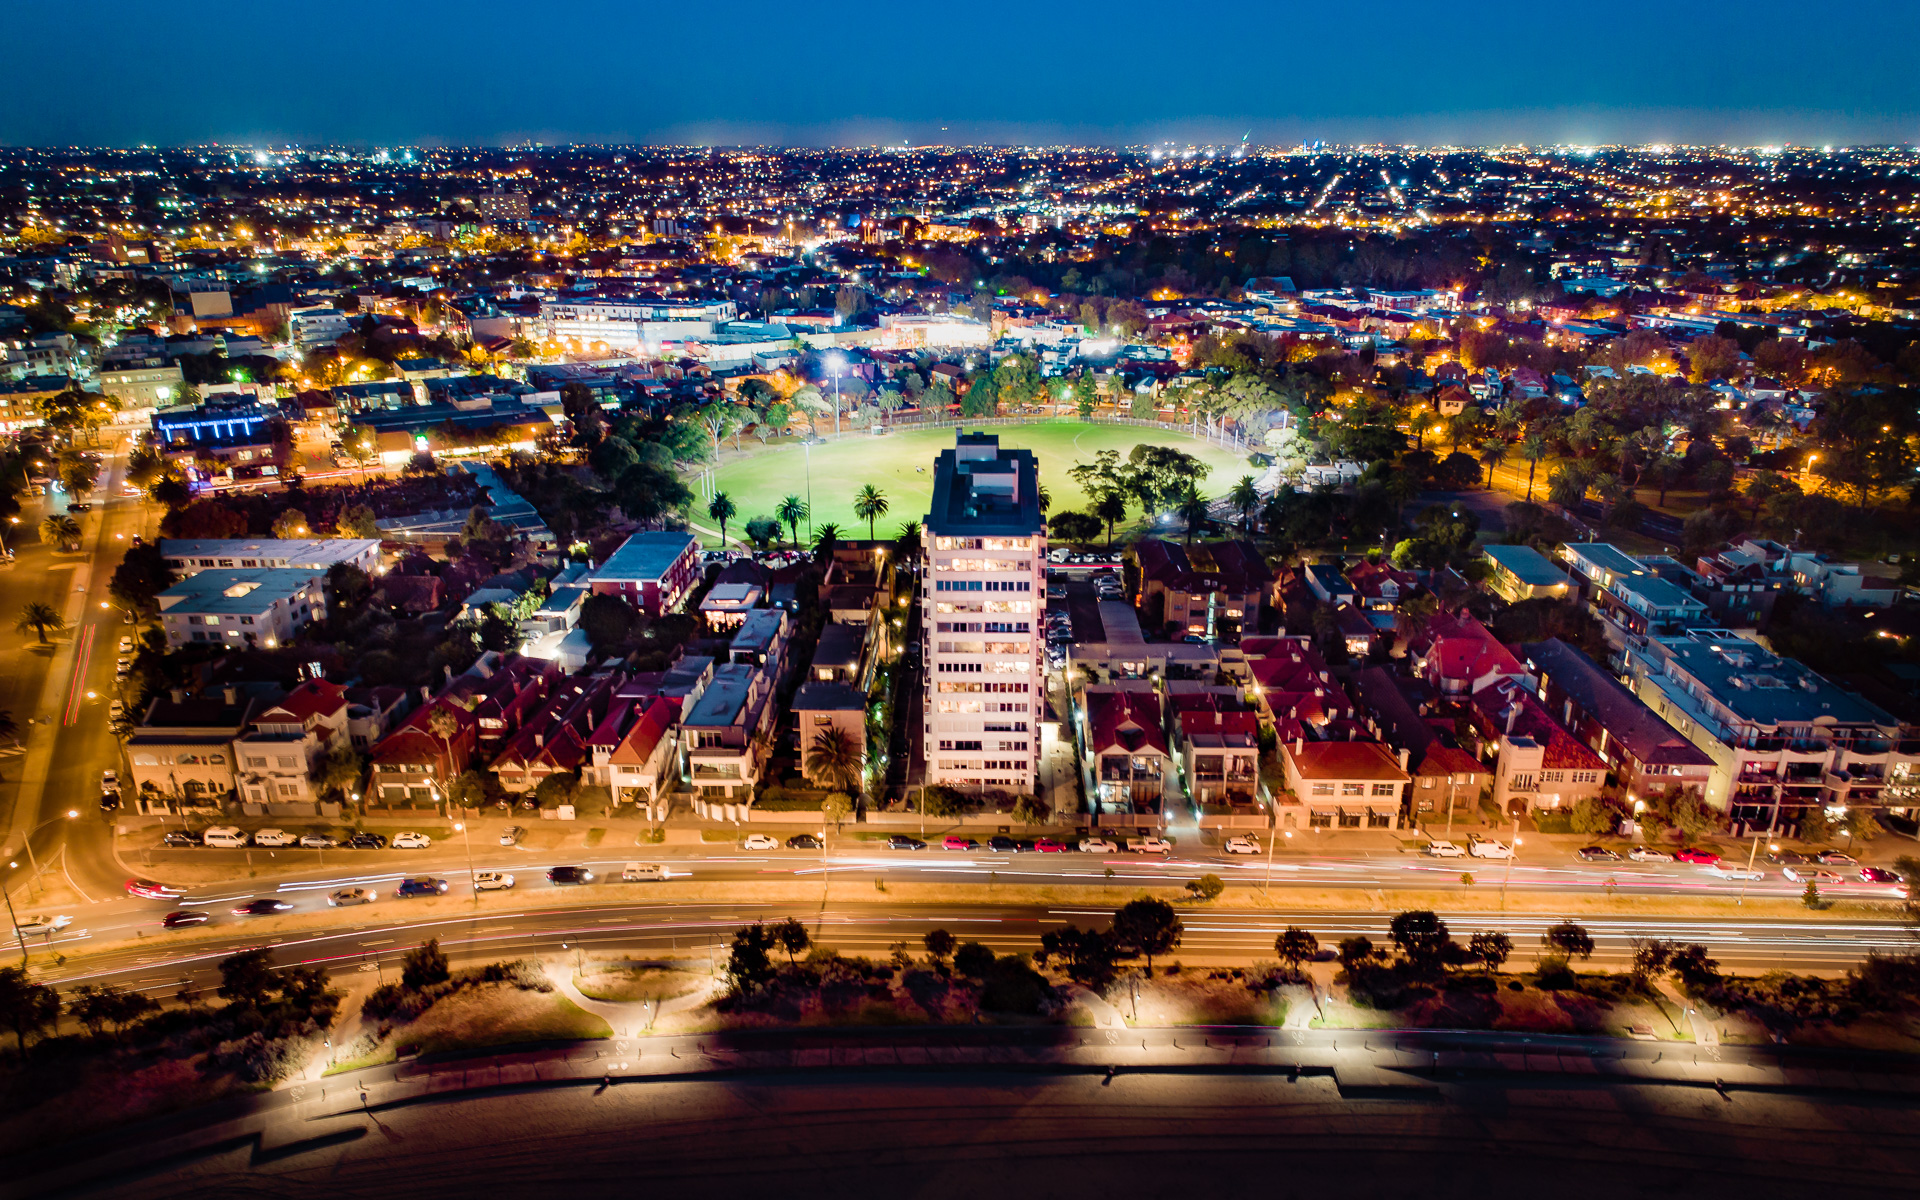
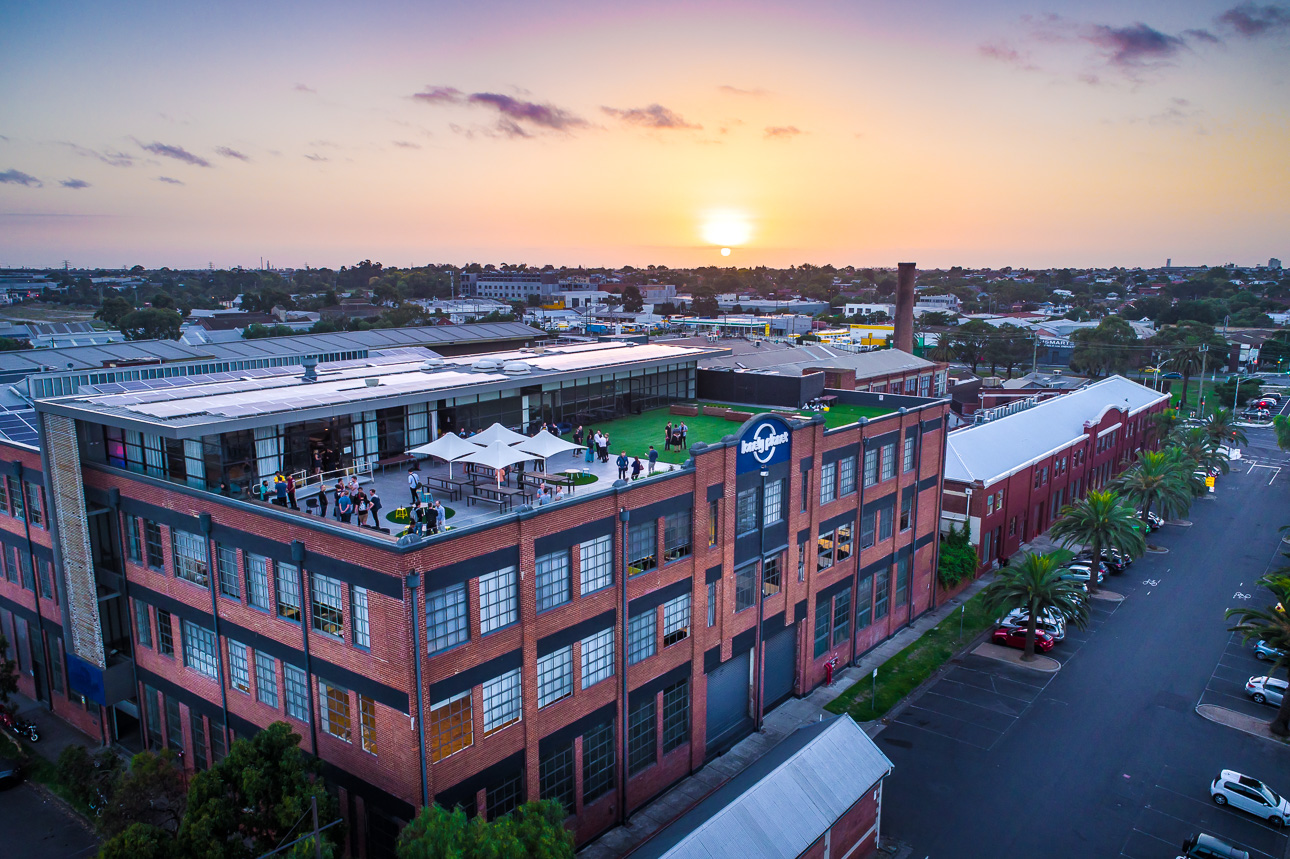
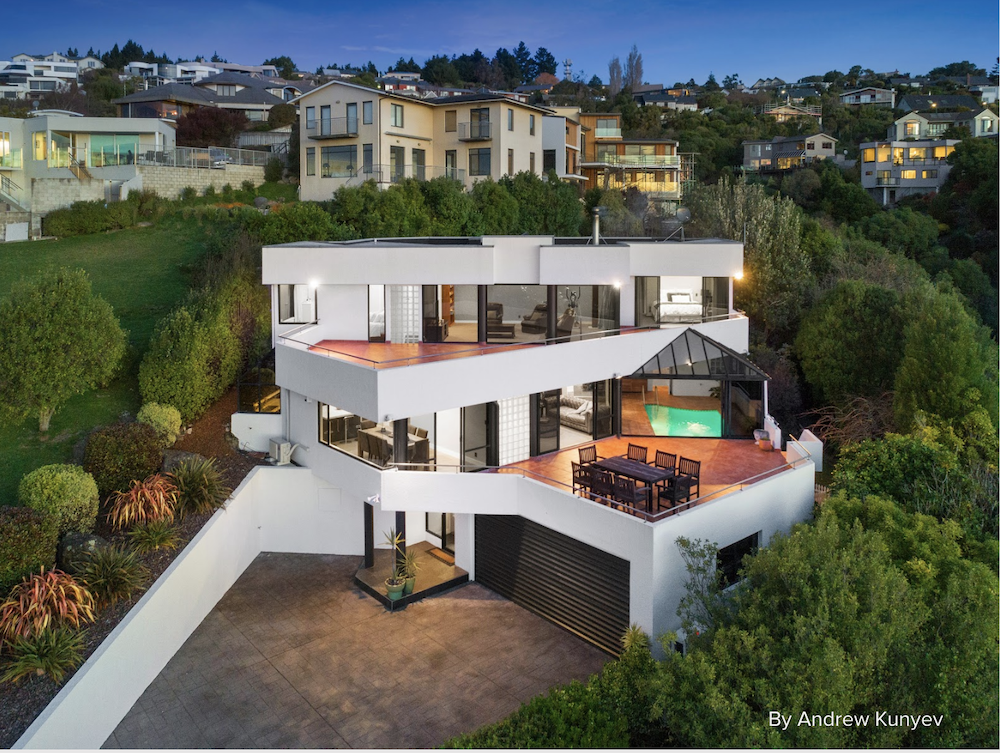
Twilight
This shot is rare but when executed correctly looks amazing. It does take a bit of practice and training and a good understanding of low light or night photography. This drone shot is a combination of pole & oblique angles taken just after last light. It requires a calm night and for all the street, house and neighbourhood lights to be on.
TIP: Monitor the time of day when all the street lights come on the night before!
EXECUTION
As you know, battery management is important to all drone operators. The most time and battery efficient way to execute the real estate photos is with the top-down shots first followed by the obliques and then ending with the pole photos.
Prior to the execution of these shots, it’s important to get on the site (with permission), set up the drone and complete pre-flight checks (camera/settings) while the drone is on the ground.
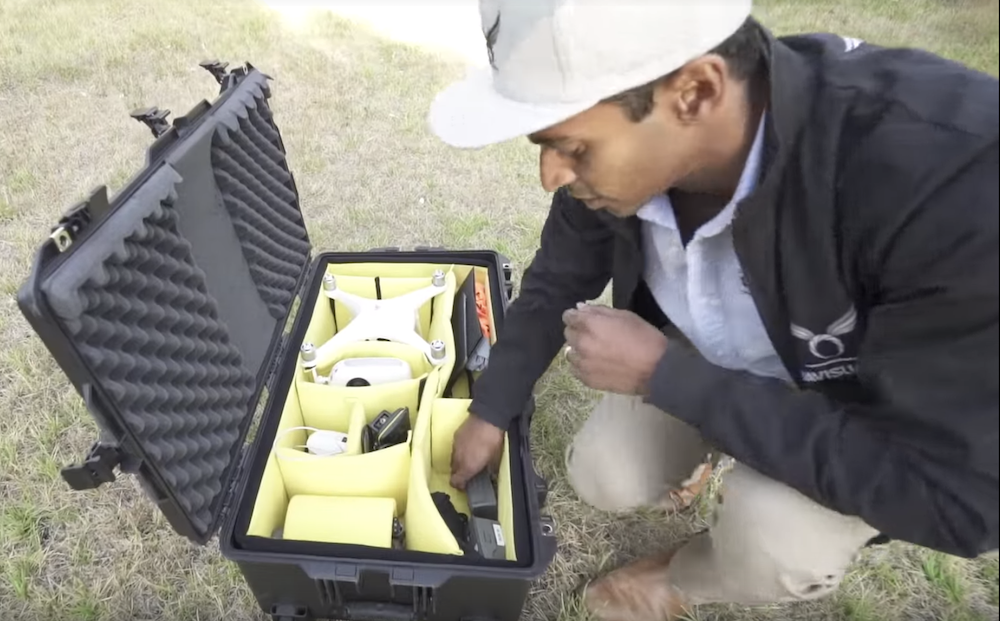
Set up your drone and begin adjusting your camera settings first
STEP 1 – Shooting the ‘Top Down Shots’
Start with the top down shots. Fly directly above the property, look straight down and take a few photos making sure streets are lined up straight. Then rotate the drone around and get different shots at this angle too.
If possible, get to the backyard of the property and set up your take off and land site there. It is always better to be in a distraction-free area such as the backyard or front veranda rather than on the street.
Take at least 3 from different altitudes, start around 30m, then 45, then 70 and so on until you get everything in the frame. Some agents may like to get neighbouring properties.
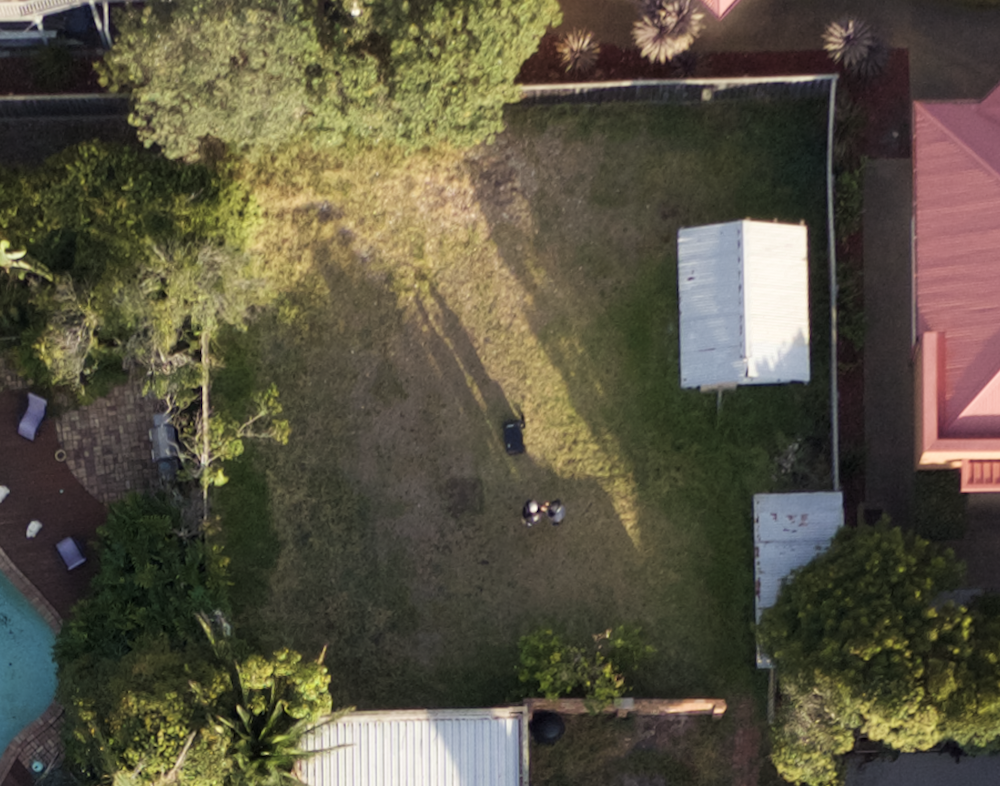
Set up in the backyard. Remove yourself later in Photoshop!
STEP 2 – Shooting the ‘Oblique Shots’
As this stage you should be nice and high (check legal limits, generally 120m/ 400ft). Then fly backwards away from the property until you get a nice frame that includes property, horizon, and sky. Frame it up and begin taking photos as you orbit around the property.
TIP: For densely populated areas you should land & launch in various locations around the property. This will minimise flying over people, busy roads, rail lines etc and allow you to stay within visual sight of the drone
STEP 3- Shooting the ‘Pole Shot’
Lastly, you finish off by doing the Pole shots. As you lower the drone to come to land, walk to the front of the property where you can see the drone come down.
Keep in mind these low altitude shots can be dangerous as there are usually powerlines, trees, light poles and other hazards on the front street. Find a nice frame and take 2 to 3 shots. Some front-on and some on a slight angle.
TIP: Check the front of the property and make sure you identify where the hazards are first!
Once you finish the pole shot you can safely land and begin your post-flight checklists & pack down.
If you want to know how to edit the drone photos check out the write-up and video in the next blog post.
Check out the range of drone workshops and training we offer: www.uavisuals.com/workshops